
Quick links: All Decals • Holographic • Funny
**How to Choose and Apply Durable Vinyl Decals for Your Car**
Selecting the right vinyl decal and applying it properly ensures a long-lasting, professional look. Focus on compatibility, sizing, and installation techniques for the best results.
## Choosing the Right Vinyl Decal
### Material and Compatibility
– **Use Oracal 651** for outdoor durability and vibrant colors.
– Ensure decals are **window-safe** or suitable for painted surfaces.
– Check if the decal is designed for **flat or slightly curved surfaces**.
### Design and Size
– Choose simple, bold designs for better adhesion and visibility.
– Measure your space carefully; avoid overly large decals on small areas.
– Leave a margin around edges for easy installation.
### Recommended Decals
– Custom logos or text for personal branding
– Sports team logos
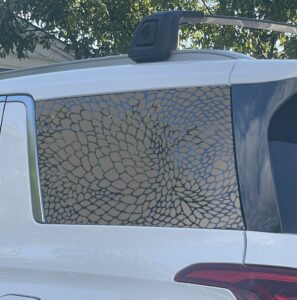
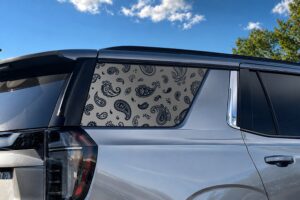
– Simple graphic or pattern decals
– Custom name or message decals
## Preparing Your Vehicle
### Surface Prep
– Wash thoroughly to remove dirt, wax, and oils.
– Dry completely; use isopropyl alcohol for a streak-free surface.
– Avoid applying decals on textured or uneven areas.
### Surface Compatibility
– **Painted surfaces**: Decals adhere well, especially if clean.
– **Windows**: Use window-safe decals; avoid tinted or reflective films unless specified.
## Applying Your Vinyl Decal
### Tools Needed
– Squeegee or credit card
– Masking tape
– Utility knife (for trimming)
– Transfer tape (if included)
### Application Steps
1. **Position the decal**: Use masking tape to mark placement.
2. **Clean surface**: Ensure surface is dry and free of debris.
3. **Peel backing**: Carefully remove the backing paper from the decal.
4. **Apply decal**: Use a squeegee to press firmly from center outward.
5. **Remove transfer tape**: Slowly peel it back at a sharp angle.
6. **Final touch-up**: Smooth out any air bubbles with the squeegee.
### Pro Tips
– Work in a dust-free environment.
– Use a heat gun on low if decals are difficult to apply on textured surfaces.
– For curved surfaces, apply slowly and use a squeegee with gentle pressure.
## Removing or Replacing Decals
### Removal Tips
– Use a heat gun to soften adhesive.
– Peel slowly at a sharp angle.
– Use adhesive remover or rubbing alcohol for residue.
### Precautions
– Avoid scratching paint; test remover on a small area first.
– Do not peel decals in direct sunlight to prevent paint damage.
## Conclusion
Choosing the right vinyl decal and applying it with care ensures a durable, eye-catching addition to your vehicle. For high-quality decals and expert advice, **shop our selection today** and give your car a personalized touch that lasts!
—
Ready to personalize your vehicle? Browse our collection of premium Oracal 651 decals now!
Shop this look
FAQs
1: How do I choose durable vinyl decals for my car?
1: Select high-quality vinyl like Oracal 651 for durability, weather resistance, and ease of removal. Ensure the decal’s adhesive suits automotive surfaces and avoid tinting over decals to prevent damage or peeling.
2: How should I prepare my car before applying a vinyl decal?
2: Clean the surface thoroughly with isopropyl alcohol, removing dirt, wax, and grease. Dry completely and ensure the area is free of contaminants for optimal adhesion.
3: How do I safely remove vinyl decals without damaging paint or glass?
3: Gently heat the decal with a heat gun or hairdryer, then peel slowly at a low angle. Use adhesive remover if needed, and clean the surface afterward to prevent residue.
{“@context”:”https://schema.org”,”@type”:”FAQPage”,”mainEntity”:[{“@type”:”Question”,”name”:”1: How do I choose durable vinyl decals for my car?”,”acceptedAnswer”:{“@type”:”Answer”,”text”:”1: Select high-quality vinyl like Oracal 651 for durability, weather resistance, and ease of removal. Ensure the decalu2019s adhesive suits automotive surfaces and avoid tinting over decals to prevent damage or peeling.”}},{“@type”:”Question”,”name”:”2: How should I prepare my car before applying a vinyl decal?”,”acceptedAnswer”:{“@type”:”Answer”,”text”:”2: Clean the surface thoroughly with isopropyl alcohol, removing dirt, wax, and grease. Dry completely and ensure the area is free of contaminants for optimal adhesion.”}},{“@type”:”Question”,”name”:”3: How do I safely remove vinyl decals without damaging paint or glass?”,”acceptedAnswer”:{“@type”:”Answer”,”text”:”3: Gently heat the decal with a heat gun or hairdryer, then peel slowly at a low angle. Use adhesive remover if needed, and clean the surface afterward to prevent residue.”}}]}