
Quick links: All Decals • Holographic • Funny
# How to Choose and Apply Durable Vinyl Car Decals
Selecting the right vinyl decal and applying it correctly ensures a long-lasting, professional look. Focus on Oracal 651 vinyl, compatibility with your vehicle’s surfaces, proper sizing, and careful installation/removal techniques.
## Choosing the Right Vinyl Decal
### Material and Compatibility
– **Use Oracal 651** for durability, outdoor resistance, and vibrant color.
– **Check surface compatibility:** Oracal 651 works best on smooth, clean painted surfaces and glass windows.
– **Avoid rough or textured surfaces** to prevent peeling or bubbling.
### Design and Size
– **Pick a design that complements your vehicle’s style.**
– **Measure your space** accurately; avoid overly large decals that may peel or small decals that get lost.
– **Pro tip:** Leave some margin around the decal edges for easier application.
## Preparing Your Vehicle
### Surface Preparation
– **Clean thoroughly:** Use isopropyl alcohol to remove dirt, wax, and grease.
– **Dry completely** to prevent trapping debris under the decal.
– **Pro tip:** Avoid applying decals in direct sunlight or on hot surfaces.
## Applying the Vinyl Decal
### Tools Needed
– Squeegee or credit card
– Masking tape
– Razor blade (optional)
– Spray bottle with soapy water (for repositioning)
### Step-by-Step Application
1. **Position the decal** on the surface using masking tape to hold it in place.
2. **Use a squeegee** to firmly press out air bubbles from the center outward.
3. **Remove the backing paper** slowly, ensuring the decal stays adhered.
4. **Smooth out any remaining bubbles** with the squeegee.
5. **Pro tip:** For large decals, apply in sections to avoid wrinkles.
## Removing Vinyl Decals
### Best Practices
– **Warm the decal** with a heat gun or hairdryer to soften the adhesive.
– **Peel slowly** from one corner, applying heat as needed.
– **Use a plastic scraper** to lift stubborn edges without damaging the paint.
– **Clean the area** with alcohol afterward to remove adhesive residue.
## Additional Tips
– **Avoid harsh solvents** that can damage paint or window tint.
– **Test a small section** first to ensure compatibility.
– **Reapply or replace** decals every few years for optimal appearance.
## Recommended Decals
– Custom logos for personal branding
– Sport team graphics
– Fun slogans or personalized messages
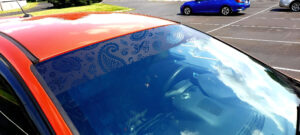
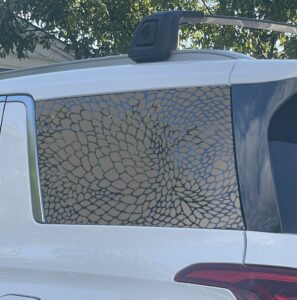
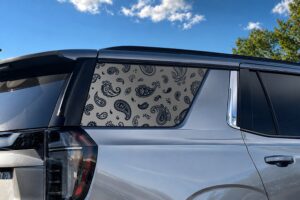
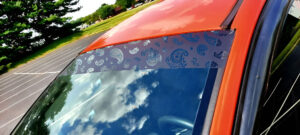
– Decorative patterns or motifs
## Conclusion
Choosing high-quality Oracal 651 vinyl decals and following proper application techniques guarantees a durable, eye-catching addition to your vehicle. Ready to upgrade your ride? **Shop our selection of premium vinyl decals today!**
Shop this look
FAQs
**Q1: How do I choose the right vinyl for car decals?**
Choose high-quality, outdoor-rated vinyl like Oracal 651 for durability and weather resistance. Ensure the vinyl is suitable for automotive use, adhering well to glass and paint surfaces without cracking or fading.
**Q2: How should I prepare my car surface before applying decals?**
Clean the area thoroughly with alcohol or mild soap, removing dirt, wax, and grease. Dry completely to ensure proper adhesion. Avoid applying decals on dusty or greasy surfaces for best longevity.
**Q3: How can I safely remove vinyl decals without damaging paint or tint?**
Gently heat the decal with a heat gun or blow dryer to loosen adhesive. Use a plastic scraper or dental floss to lift edges, then peel slowly. Clean residual adhesive with isopropyl alcohol to prevent damage.
{“@context”:”https://schema.org”,”@type”:”FAQPage”,”mainEntity”:[{“@type”:”Question”,”name”:”**Q1: How do I choose the right vinyl for car decals?**”,”acceptedAnswer”:{“@type”:”Answer”,”text”:”Choose high-quality, outdoor-rated vinyl like Oracal 651 for durability and weather resistance. Ensure the vinyl is suitable for automotive use, adhering well to glass and paint surfaces without cracking or fading.”}},{“@type”:”Question”,”name”:”**Q2: How should I prepare my car surface before applying decals?**”,”acceptedAnswer”:{“@type”:”Answer”,”text”:”Clean the area thoroughly with alcohol or mild soap, removing dirt, wax, and grease. Dry completely to ensure proper adhesion. Avoid applying decals on dusty or greasy surfaces for best longevity.”}},{“@type”:”Question”,”name”:”**Q3: How can I safely remove vinyl decals without damaging paint or tint?**”,”acceptedAnswer”:{“@type”:”Answer”,”text”:”Gently heat the decal with a heat gun or blow dryer to loosen adhesive. Use a plastic scraper or dental floss to lift edges, then peel slowly. Clean residual adhesive with isopropyl alcohol to prevent damage.”}}]}