
Quick links: All Decals • Holographic • Funny
# How to Choose and Apply Durable Vinyl Car Decals
Selecting the right vinyl decal and applying it properly ensures long-lasting, professional-looking results. Focus on Oracal 651 vinyl, compatibility with windows or painted surfaces, correct sizing, and proper installation/removal techniques.
## Choosing the Right Vinyl Decal
### Material & Vinyl Type

– **Oracal 651** is a popular, durable, and outdoor-rated vinyl ideal for car decals.
– Ensure the decal is made with weather-resistant, UV-protected vinyl for longevity.
### Surface Compatibility
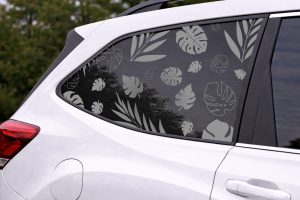
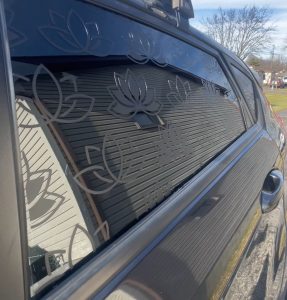
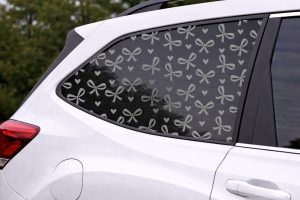
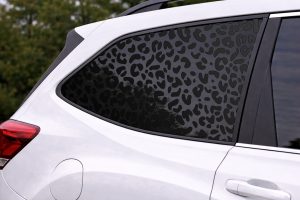
– **Windows:** Oracal 651 adheres well to glass surfaces. Use a decal with a transparent backing for clarity.
– **Painted surfaces:** Make sure the paint is clean, dry, and free of wax or oils.
### Sizing & Design
– Measure the area where the decal will go—avoid oversized decals that may peel or catch on objects.
– Opt for simple, bold designs for better adhesion and visibility.
## Preparing Your Vehicle
### Surface Cleaning
– Clean with isopropyl alcohol or a mild detergent.
– Remove dirt, wax, and grease; dry thoroughly.
### Surface Compatibility Check
– Test a small corner of the decal on the surface to ensure adhesion and removal without damage.
## Applying the Vinyl Decal
### Tools Needed
– Squeegee or credit card
– Masking tape
– Transfer tape (if not pre-assembled)
### Application Steps
1. **Position the decal:** Use masking tape to hold it in place, checking placement.
2. **Apply transfer tape:** If needed, apply and smooth out to transfer the decal.
3. **Peel backing:** Carefully peel the backing paper, exposing the adhesive.
4. **Apply to surface:** Starting from one edge, use a squeegee to press out air bubbles and ensure adhesion.
5. **Remove transfer tape:** Slowly peel it away at a sharp angle.
### Pro Tips
– Apply in a dust-free environment.
– Use a heat gun or hairdryer on low if decals are challenging to adhere to textured surfaces.
## Removal & Maintenance
### Removing Decals
– Use a plastic scraper or credit card to lift edges gently.
– Apply heat to soften adhesive if needed.
– Clean residual adhesive with alcohol or decal remover.
### Maintenance Tips
– Wash with mild soap; avoid abrasive cleaners.
– Minimize exposure to harsh chemicals.
## Recommended Decals
– Custom logo decals
– Sports team graphics
– Personal slogans or designs
– Brand or business signage
## Conclusion
Choosing the right vinyl decal and applying it correctly ensures durability and a professional look. Follow these steps for a seamless application and easy removal when needed. Ready to personalize your vehicle? Shop our selection of high-quality Oracal 651 decals today!
Shop this look
FAQs
**Q1: How do I choose durable vinyl decals for my car?**
Select high-quality vinyl like Oracal 651 for durability and weather resistance. Ensure the decal is designed for outdoor use and compatible with car surfaces. Consider the color, size, and adhesive strength based on your placement area for long-lasting results.
**Q2: How should I prepare my car surface before applying a vinyl decal?**
Clean the area thoroughly with isopropyl alcohol to remove dirt, oils, and wax. Dry completely to ensure proper adhesion. For glass, ensure no residue; for paint, wait until the surface is fully cured and free of scratches or defects.
**Q3: How do I remove vinyl decals and tint without damaging my car?**
Heat the decal with a heat gun or hairdryer to soften adhesive. Peel slowly from one edge, using plastic tools to avoid scratches. For tint, professional removal is recommended to prevent paint damage; avoid aggressive scraping or solvents on paint.
{“@context”:”https://schema.org”,”@type”:”FAQPage”,”mainEntity”:[{“@type”:”Question”,”name”:”**Q1: How do I choose durable vinyl decals for my car?**”,”acceptedAnswer”:{“@type”:”Answer”,”text”:”Select high-quality vinyl like Oracal 651 for durability and weather resistance. Ensure the decal is designed for outdoor use and compatible with car surfaces. Consider the color, size, and adhesive strength based on your placement area for long-lasting results.”}},{“@type”:”Question”,”name”:”**Q2: How should I prepare my car surface before applying a vinyl decal?**”,”acceptedAnswer”:{“@type”:”Answer”,”text”:”Clean the area thoroughly with isopropyl alcohol to remove dirt, oils, and wax. Dry completely to ensure proper adhesion. For glass, ensure no residue; for paint, wait until the surface is fully cured and free of scratches or defects.”}},{“@type”:”Question”,”name”:”**Q3: How do I remove vinyl decals and tint without damaging my car?**”,”acceptedAnswer”:{“@type”:”Answer”,”text”:”Heat the decal with a heat gun or hairdryer to soften adhesive. Peel slowly from one edge, using plastic tools to avoid scratches. For tint, professional removal is recommended to prevent paint damage; avoid aggressive scraping or solvents on paint.”}}]}