
Quick links: All Decals • Holographic • Funny
## How to Choose the Best Vinyl Decals for Car Windows
Selecting the right vinyl decals for your car windows involves understanding vinyl types, compatibility with your vehicle, proper sizing, and installation/removal techniques. Focus on high-quality Oracal 651 decals, ensuring they are suitable for glass surfaces and easy to remove without damage.

## Understanding Vinyl Types and Compatibility
### Why Oracal 651?

– **Durability**: Up to 6 years outdoors.
– **Adhesive**: Permanent, but removable from glass.

– **Finish**: Glossy, vibrant colors.
### Window Compatibility
– Oracal 651 is designed for smooth, clean glass surfaces.
– Avoid using on tinted windows unless specified; test first.
– Ensure the decal is not in direct contact with the paint or rubber seals to prevent damage.
## Choosing the Right Size and Design
### Sizing Tips
– Measure your window space accurately.
– Keep decals proportionate to window size; large decals may hinder visibility.
– For visibility and safety, avoid obstructing mirrors or driver views.
### Design Considerations
– Use bold, simple designs for clarity.
– Avoid overly intricate details that may be hard to cut or apply.
– Consider transparency or cut-out designs for a subtle look.
## Installation Best Practices
### Preparation
– Clean the window thoroughly with alcohol or glass cleaner.
– Dry the surface completely; avoid applying on dirty or wet glass.
### Application
– Use a squeegee or credit card to smooth out bubbles.
– Apply decals slowly, starting from one edge.
– Use masking tape as a registration guide if needed.
### Pro Tips
– Work in a dust-free environment.
– For larger decals, use application tape to position accurately.
## Removal and Maintenance
### Removal Tips
– Gently peel from a corner at a 45-degree angle.
– Use heat from a heat gun or hairdryer to soften adhesive if stubborn.
– Clean residual adhesive with glass cleaner or adhesive remover.
### Maintenance
– Clean with non-abrasive glass cleaner.
– Avoid harsh chemicals that can degrade vinyl over time.
## Recommended Decals
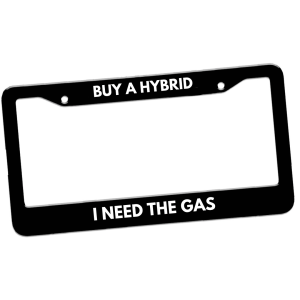
– Custom text decals for personal expression.
– Logo or branding decals for small business advertising.
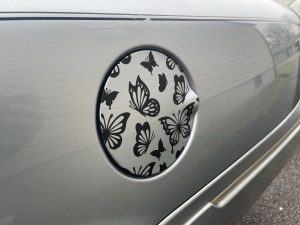
– Decorative patterns or silhouettes for aesthetic enhancement.
## Conclusion
Choosing the right vinyl decals for your car windows ensures a stylish, professional look while maintaining safety and easy removal. Focus on high-quality Oracal 651 vinyl, proper sizing, and correct installation techniques for the best results.
**Ready to personalize your vehicle? Shop our selection of premium vinyl decals today!**
Shop this look


FAQs
1: How do I select the right vinyl for car windows?
1: Use high-quality, outdoor-rated vinyl like Oracal 651 for durability and easy removal. Ensure it’s compatible with glass and won't damage paint or tint during application or removal.
2: Can I apply vinyl decals over window tint?
2: Yes, but ensure the tint is fully cured and compatible with vinyl. Test a small area first to prevent damage or peeling during removal.
3: How should I remove vinyl decals from car windows?
3: Gently heat the decal with a heat gun or hairdryer to loosen adhesive. Peel slowly, and use a vinyl remover or alcohol-based cleaner to eliminate residue without damaging glass or tint.
{“@context”:”https://schema.org”,”@type”:”FAQPage”,”mainEntity”:[{“@type”:”Question”,”name”:”1: How do I select the right vinyl for car windows?”,”acceptedAnswer”:{“@type”:”Answer”,”text”:”1: Use high-quality, outdoor-rated vinyl like Oracal 651 for durability and easy removal. Ensure itu2019s compatible with glass and won’t damage paint or tint during application or removal.”}},{“@type”:”Question”,”name”:”2: Can I apply vinyl decals over window tint?”,”acceptedAnswer”:{“@type”:”Answer”,”text”:”2: Yes, but ensure the tint is fully cured and compatible with vinyl. Test a small area first to prevent damage or peeling during removal.”}},{“@type”:”Question”,”name”:”3: How should I remove vinyl decals from car windows?”,”acceptedAnswer”:{“@type”:”Answer”,”text”:”3: Gently heat the decal with a heat gun or hairdryer to loosen adhesive. Peel slowly, and use a vinyl remover or alcohol-based cleaner to eliminate residue without damaging glass or tint.”}}]}
