
Quick links: All Decals • Holographic • Funny
**How to Choose Durable Vinyl Decals for Your Car or Truck**
Selecting the right vinyl decals ensures longevity, vibrant appearance, and easy removal when needed. Focus on Oracal 651 vinyl, compatibility with your vehicle’s surface, proper sizing, and correct installation techniques to achieve the best results.
## Understanding Vinyl Types and Compatibility
### Why Oracal 651?

– **Durability:** Up to 6 years outdoor lifespan.
– **Adhesion:** Strong enough for cars, yet removable without residue.
– **Finish:** Available in gloss, matte, and satin.
### Surface Compatibility
– **Painted surfaces:** Perfectly compatible with smooth, clean paint.
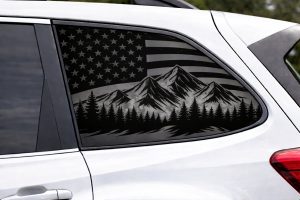
– **Windows:** Use a window-specific vinyl or ensure proper application with window-safe adhesives.
– **Avoid:** Rough, textured, or damaged surfaces for best adhesion.
## Choosing the Right Size and Design
### Sizing Tips
– **Measure your space:** Use a tape measure or template beforehand.
– **Consider visibility:** Larger decals are more eye-catching; smaller ones add subtle accents.
– **Pro tip:** Leave a margin around edges for a cleaner look.
### Design Considerations
– **Simple designs:** Easier to install and remove.
– **Color contrast:** Ensure your decal’s color stands out against your vehicle’s paint or tint.
– **Avoid overly complex details** that may peel or lift over time.
## Installation & Removal Best Practices
### Installation Tips
– **Clean thoroughly:** Use alcohol-based cleaner to remove dirt and wax.
– **Use a squeegee:** Apply firm, even pressure to eliminate air bubbles.
– **Temperature matters:** Install in 60-80°F weather for best adhesion.
– **Pro tip:** Use masking tape to position decals before peeling backing.
### Removal Tips
– **Warm the decal:** Use a heat gun or hairdryer to soften adhesive.
– **Peel slowly:** Start at a corner and pull at a 45-degree angle.
– **Clean residue:** Use adhesive remover if necessary, avoiding paint damage.
## Recommended Decals
– Custom lettering or logos in Oracal 651 for durability.
– Simple graphic designs with bold colors for high visibility.
– Window decals with UV-resistant inks.
## Conclusion
Choosing the right vinyl decal involves selecting high-quality Oracal 651, ensuring compatibility with your vehicle, sizing appropriately, and following proper installation and removal techniques. This guarantees a vibrant, long-lasting decal that enhances your vehicle’s style.
**Ready to personalize your ride? Shop our selection of durable vinyl decals today!**
Shop this look

FAQs
1: What type of vinyl is best for durable car decals?
1: Oracal 651 is a high-quality, medium-term vinyl ideal for car decals due to its durability, weather resistance, and ease of removal from glass and painted surfaces.
2: Can I apply vinyl decals over tint or painted surfaces?
2: Yes, but ensure the surface is clean and dry. Oracal 651 adheres well to glass and painted surfaces; avoid applying over existing decals or damaged tint for best longevity.
3: How do I safely remove old decals without damaging my car?
3: Use heat (e.g., a heat gun or hairdryer) to soften the adhesive, then gently peel with a plastic scraper. Clean residual adhesive with isopropyl alcohol; avoid scratching paint or tint.
{“@context”:”https://schema.org”,”@type”:”FAQPage”,”mainEntity”:[{“@type”:”Question”,”name”:”1: What type of vinyl is best for durable car decals?”,”acceptedAnswer”:{“@type”:”Answer”,”text”:”1: Oracal 651 is a high-quality, medium-term vinyl ideal for car decals due to its durability, weather resistance, and ease of removal from glass and painted surfaces.”}},{“@type”:”Question”,”name”:”2: Can I apply vinyl decals over tint or painted surfaces?”,”acceptedAnswer”:{“@type”:”Answer”,”text”:”2: Yes, but ensure the surface is clean and dry. Oracal 651 adheres well to glass and painted surfaces; avoid applying over existing decals or damaged tint for best longevity.”}},{“@type”:”Question”,”name”:”3: How do I safely remove old decals without damaging my car?”,”acceptedAnswer”:{“@type”:”Answer”,”text”:”3: Use heat (e.g., a heat gun or hairdryer) to soften the adhesive, then gently peel with a plastic scraper. Clean residual adhesive with isopropyl alcohol; avoid scratching paint or tint.”}}]}
