
Quick links: All Decals • Holographic • Funny
**How to Choose Durable Vinyl Decals for Your Car**
Selecting the right vinyl decals ensures long-lasting, vibrant designs that withstand weather and car washes. Focus on Oracal 651 vinyl, compatibility with your vehicle’s surface, proper sizing, and proper installation/removal techniques for the best results.
## Understanding Vinyl Types and Durability
### Why Oracal 651?
– **Durability:** Up to 6 years outdoors
– **Finish:** Glossy, easy to cut and weed
– **Best Use:** Car decals, labels, graphics
### Pro Tip:
Always verify the vinyl type—Oracal 651 is ideal for exterior decals due to its durability and adhesive strength.
## Compatibility with Car Surfaces
### Paint vs. Windows
– **Painted surfaces:** Use Oracal 651 directly on clean, smooth painted areas
– **Windows:** Ensure the vinyl is rated for glass; Oracal 651 is suitable but test for adhesion and removal
### Tips:
– Clean surfaces thoroughly with isopropyl alcohol before application
– Avoid textured or damaged surfaces for best adhesion
## Sizing Your Decal
### Considerations:
– **Proportions:** Match decal size to vehicle area without obstructing visibility
– **Visibility:** Larger decals are more eye-catching, but avoid covering essential features
– **Placement:** Center or align with existing lines for aesthetic appeal
### Pro Tip:
Use masking tape to visualize size before applying the decal permanently.
## Installation Best Practices
### Steps:
1. **Clean surface thoroughly** with alcohol
2. **Position decal** with painter’s tape
3. **Apply a transfer tape** for precise placement
4. **Use a squeegee** to smooth out bubbles
5. **Peel transfer tape carefully** once adhered
### Tips:
– Work in a dust-free environment
– Apply in moderate temperature (60-80°F) for optimal adhesion
## Removal and Repositioning
### Best Practices:
– Use a heat gun or hairdryer to soften adhesive
– Peel slowly at a 45° angle
– Use adhesive remover for residue if needed
### Pro Tip:
Test a small area first to avoid paint damage, especially on painted surfaces.
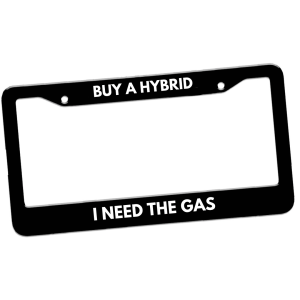
## Recommended Decals
– Custom logos or text designs
– Car club or team graphics
– Personal artwork or slogans
—
## Conclusion
Choosing a durable, compatible vinyl decal like Oracal 651 and applying it correctly ensures your design remains vibrant and intact for years. Proper surface prep, sizing, and installation are key. Ready to personalize your vehicle? **Shop our selection of high-quality vinyl decals today!**
Shop this look


FAQs
**Q1:** What vinyl should I choose for durable car decals?
**A1:** Opt for high-quality outdoor vinyl like Oracal 651, which is UV and weather resistant, ensuring longevity on paint and glass while maintaining vibrant color over time.
**Q2:** Can I apply vinyl decals over window tint or on glass?
**A2:** Yes, Oracal 651 adheres well to glass and over tint, but ensure surfaces are clean and dry. Avoid placing decals over textured or uneven tint films to prevent peeling.
**Q3:** How do I remove durable vinyl decals without damaging my car?
**A3:** Use heat (a heat gun or hairdryer) to soften adhesive, then peel slowly. Apply adhesive remover if needed, and clean the area with soap and water afterward to prevent residue or damage.
{“@context”:”https://schema.org”,”@type”:”FAQPage”,”mainEntity”:[{“@type”:”Question”,”name”:”**Q1:** What vinyl should I choose for durable car decals?”,”acceptedAnswer”:{“@type”:”Answer”,”text”:”**A1:** Opt for high-quality outdoor vinyl like Oracal 651, which is UV and weather resistant, ensuring longevity on paint and glass while maintaining vibrant color over time.”}},{“@type”:”Question”,”name”:”**Q2:** Can I apply vinyl decals over window tint or on glass?”,”acceptedAnswer”:{“@type”:”Answer”,”text”:”**A2:** Yes, Oracal 651 adheres well to glass and over tint, but ensure surfaces are clean and dry. Avoid placing decals over textured or uneven tint films to prevent peeling.”}},{“@type”:”Question”,”name”:”**Q3:** How do I remove durable vinyl decals without damaging my car?”,”acceptedAnswer”:{“@type”:”Answer”,”text”:”**A3:** Use heat (a heat gun or hairdryer) to soften adhesive, then peel slowly. Apply adhesive remover if needed, and clean the area with soap and water afterward to prevent residue or damage.”}}]}
